


Custom-Built Timber Connectors
– Designed and manufactured to meet your needs.
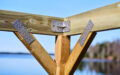
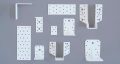
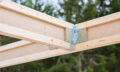
Angle brackets are essential components in everything from roof trusses and wall studs to floor joists and pergolas. But to ensure your connections can withstand the load, proper installation is crucial – with the right bracket, the right nail or screw dimensions, and the correct nailing pattern.
We offer a wide range of angle brackets to suit different needs. All our brackets are CE-marked and tested according to Eurocode 5 and the Swedish standard SS-EN 1995-1-1:2004. This means they can handle high loads – provided they are installed according to the instructions.
To achieve maximum load-bearing capacity, make sure to:
Tip! In some cases, you may need to use double brackets or shorter nails/screws to avoid overlap on narrower timber widths. You’ll find all of this – and much more – in our detailed Dimensioning Handbook.
If you’re unsure about how to install your angle brackets, we recommend reading our Design Manual. It covers everything from load-bearing capacity to nailing patterns for each bracket type. You can download the manual at joma.se by logging in as a designer.
If you have any questions, feel free to contact us at: teknik@joma.se
– Designed and manufactured to meet your needs.
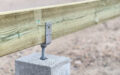
We have just released a new series of adjustable column shoes that fit pre-cast ...
Adaptive. Durable. Almost Invisible.

– easy assembly and perfect inclination.
As a designer, the choice of building materials is crucial to ensure both ...

Part three of our series on the advantages of construction fittings made in ...

...
Last spring we launched a new series of construction fittings, Black by Joma, it ...
We are pleased to launch a new product group to our already wide range of ...
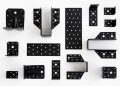
We are pleased to present a new series of construction fittings, Black by Joma.